Archives April 2008

Waiting for the best weather to plant

Planting the garden or flowers requires a bit of pre-planing if we are to be successful at all and Waiting for the best weather to plant can be the hardest part.The planning is just part of the fun but how well we plan can make the difference between a great garden or total failure. The big question is what is the best time to plant the garden or flowers.

We live in a zone 4 growing zone and that means we can get a frost up to the end of may. We have grown here for many years and our experience tells us that the weather may be nice but it can change very quickly. We have had snow on the fourth of July.

The past few days the weather has been very pleasant and today the temperatures went past 80 degrees. This was a record but by only 1 degree. The point is this warm weather can fool people into thinking it is later in the season than it really is. All day today I kept thinking I was far behind and then I would remember that its the middle of April.

We needed some hardware and stopped by Lowe’s to check out the plants and we were surprised to see there were tomato and pepper plants ready. They also had petunias and geraniums out. I had to wonder what would happen if a freeze hit. But they use vendors who supply the plants and that also explains why they are usually in poor shape.

The big box stores and grocery stores could care less about planting dates and zones. We were looking at a very nice plant and it claimed to be a perennial but when we looked at the cold heartiness we found that the plant was suited for temperatures of 10 degrees to zero Fahrenheit. Not at all suited for this area where the temps can go to 30 below.

We take pride in the fact that our customers know that planting early is foolish and can be a waste of money. So we take advantage of this nice weather to take care of all the early garden chores like cleaning out the perennial beds and so forth. Unless they have changed the calendar there will be plenty of time for the garden.

Starting and growing Vinca Vine

Vinca vine is a trailing plant with heart shaped leaves that are green, gold and cream colored. The leaves grow from the vine in un-paired units getting smaller until they reach the tip. The flowers are a really nice blue lavender. Vinca vine is a standard addition to many hanging baskets and is used only as a annual around here because the vinca vine is more suited for zone 7 than our chilly 4. This shot does not show the trailing aspect but we will add some more photos in a day or so.

One way to make sure you have enough is to learn the tricks and techniques of starting and growing vinca vine.

Vinca Vine

Vinca Vine

The vines can trail down 24 or more inches and it sends out new shoots from the root cluster as the season wears on. Even though the vinca is a zone 7 plant we find it can be wintered over in the greenhouse and this year we had good success at propagating them.
We started with a season end root clump. The root cluster is tightly bound just below the surface but we found that if we were careful we could carefully cut and tease the shoots apart in to separate plants.
We potted the separate plants with roots into 4 inch pots with Pro_Mix and kept them damp, not wet. Phyllis treated them with a low nitrogen fertilizer until they became established.
Now the plants are about 6 weeks old and sending out new shoots. We treat them with a evenly balanced fertilizer and give them the 10 day treatment with pyola oil like everything else in the greenhouse. Once a month Phyllis treats everything with Serenade to reduce the chance of fungal and mildew.
In-addition to the rooted shoots I took some stem pieces with 6 leaves and pulled the bottom 3 off. Then I dipped them into a rooting hormone and buried the bottom 3 nodes in Pro_Mix and kept them damp. A good number of them have developed roots and are showing signs of leaf growth and new shoots. It looks like the old 3 leaf stems are supporting the new growth and I probably will clip them back after some new shoots get started.
Over all we have found this to be a successful experiment in where we have turned one shaggy vinca vine into 20 healthy new ones. A few years ago we tried to get some started but were unsuccessful, probably do to the advice we were following. Somewhere we had read that a good rooting mix included peat and sharp sand. We mixed it up in the proportions suggested and even though it seemed a bit heavy we tried it and the experiment was a failure. The sand makes everything too heavy and does not allow water to pass through. We also tried to mix pearlite in with the peat but that was a mess and it did not hold water. Now all we use is straight Pro_Mix BX and we have no trouble at all.

Pro Mix

pro mix bail

The bails weigh about 75 pounds and one bail will fill 100 gallons. Read more about it at the Premier site.
Next winter we will probably try for more vinca vine.

Starting and transplanting tomatoes

Starting and transplanting tomatoes can be a time and labor consuming task, but with the right method its fun too. In this method we start with a 10 by 20 plastic flat with drainage holes in the bottom. These starting flats will fit in a regular 10 by 20 daisy flat, or a web flat, named for the web design. It is important that these containers are cleaned to remove any disease organisms, pests or seeds. We wash them with a bit of dish soap and disinfect them in a 9 to one water and Clorox mixture.

In a separate container we wet the starting medium, in this case Pro-Mix bx. This is a sterile medium that is well suited for starting tomato but it must be wetted before it is used for ease of handling. The dry Pro-Mix is poured into a pail or wheelbarrow and water is added and mixed in until the medium is damp enough to hold into a ball in hand but not so wet that water can be rung out.

We put about a inch and a half of starting medium into the flats and level it with a 8 inch plastic putty knife. We then use the knife to make rows the long way in the flats by pressing the blade into the medium to a depth of no more than 1/2 inch. There is room for 6 or 7 rows across, depending on how close we make them.

Now we plant the seeds. Tomato seeds are fairly small, but not too small that we can not use our fingers to drop them one at a time into the trench made with the putty knife. Another way to plant them is to pour a quantity of seeds into a “V” of paper made from folding any kind of paper in half. Then the seeds can be tapped out one at a time using the end of a pencil. We plant the tomato seeds no closer than 1/2 inch and usually closer to 3/4’s of an inch apart.

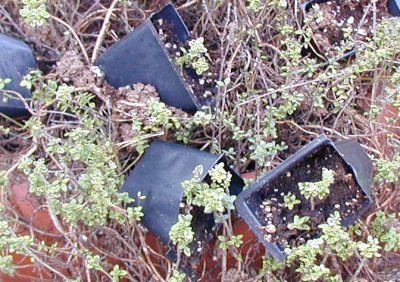
When we finish with any particular variety we mark the rows right away, with a tag so that we can keep them separate. If the flat is all one variety it is easy but if we have 2 or 3 in a flat it becomes necessary to mark them because they all will look more or less the same when they start growing. I can still hear my father cursing a nursery where he thought he was getting big boy tomatoes and ended up with some kind of yellow cherry which are nice tomatoes but a poor replacement for the big boy.

We back fill the trenches by pinching the soil in from the sides of the little trenches and we give them a very light sprinkle of water from the small watering can. Now we cover them with clear cling wrap and put them where they will be warm, in our case on the front of the benches that are heated from below. We keep an eye on them during the day when strong sun can raise the temperature of the clear wrap covered soil to more than 100 degrees F. If it looks like they are getting too hot we uncover them.

Every day we raise the edge of the wrap to see if anything is starting and to make sure they are just damp. As soon as the seedlings begin to appear above the soil we remove the wrap and make sure the flats are in direct sun. We want the seedling tomatoes to grow strong. We are also careful with water. If the soil is too damp molds and fungus can appear and this can cause the plants to “damp off”. Damping off is a term that describes the condition where seedlings rot at the soil level from fungus or molds. By starting with clean flats and fresh Pro-Mix we greatly reduce the likely hood of this occurring, in-fact we have never had the problem with tomatoes.

The emerging tomato seedlings will have one set of narrow and sharply pointed leaves as they begin to grow. Within a week or so the plants will develop a second set of true leaves and this is when we need to be on our toes. We want to transplant them in the 6 packs in which they will be sold and if they get too big the roots get tangled and it is harder to work with them.

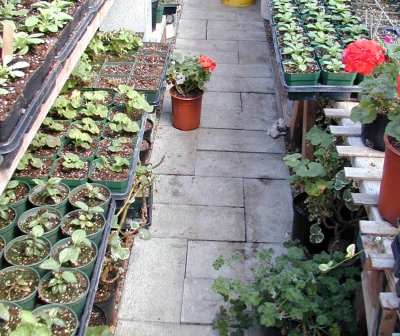
We use a 6/8 tray which have 8 – 6 packs for a total of 48 cells in a 10 by 20 inch flat. These also fit in the daisy flats. We put an empty sheet of 6 packs into a daisy tray and fill the cells with damp Pro-Mix that is leveled off by hand to loosely fill each cell. Then we begin to take the seedlings from the starting flat and plant them individually into the 6 packs. The seedlings are fairly delicate so they must be handled with great care so as not to crush the stems. Some people advocate handling them by the leaves but we have always handled them by the stem being really careful not to squeeze them.

We start by making holes in the soil that fills the 6 packs using a finger all the way to the bottom of the flat. The seedlings are then put roots and everything right to the bottom of the hole. We firm the medium up to support the stem and add a bit extra if it looks like the cell is not full. We pack them firm but not tight. We give them a few days to stabilize and then begin to give them a balanced fertilizer once a week until they are sold.

After a short period of about 2 to 2 1/2 weeks we pinch the tops off to encourage branching. This does not hurt the plants and helps to keep them from getting leggy. We keep them pinched back until they are ready to finish up and go out into the world.

As soon as we can we begin to move them out of the greenhouse and into the sun and wind. At first we give them only an hour or so in the morning or after noon but in a week or 2 they can be left out all the time, unless a frost is imminent. Then we have to decide whether to leave them out and cover them with old sheets or bring them back into the greenhouse which by this time of the year is busting with plants. If the temperatures are forecasted to be in the mid 30s we generally leave them out but any lower they go into the greenhouse. Tomatoes will freeze easily and a freak frost can ruin the whole crop.

Every year we start something different and this year is no exception. We usually have an early determinate variety like early girl or Oregon spring. These tomatoes will grow in a tight bush and stop growing when they are a few fee high, unlike a indeterminate variety like super sweet 100 which will grow 6 to 8 feet high on a trellis. This year we have started a tomato variety called “tumbling tom” which is bred for baskets. Phyllis has tried to grow super sweet 100 in baskets with less than satisfactory results. The super sweets do not want to hang down with out breaking, they are better for climbing. So we thought we would give the tumbling toms a try. There will be a post on them as soon as we see how they were.

For now everything is growing and we have a forecast of at least a week of sunny or partly sunny weather that will give the new tomato starts a great boost.

Proper greenhouse floor

This is how the entry to the greenhouse looks this time of year.

greenhouse stoop

And this is what the greenhouse floor looks like.

greenhouse floor

Thanks to a bit of hard work and some pre planning we do not have to battle weeds or walk in mud.
The first year we put the greenhouse up we did not have time for a proper floor. That first year we only had time to get the new cover on and thaw things out. We had assembled the foundation and frame the past fall with the idea that we would put new plastic up the following spring.

That next spring we brought a salamander heater in to thaw things out. We did not have heat or ventilation yet but the electricity had been run out that past fall. Kristopher dug a 130 foot trench for the underground conduit that carries the 220 power, telephone and data cables.

Our property is the low spot in an area of more than 100 acres and so it tends to be wet in the spring. We must wear boots when we go back to work because some of the water is 6 inches deep.

So that first year we had a soggy mess in the greenhouse. We did not consider the water would pass under the foundation beams and into the greenhouse but it did. As a matter of fact it just about flowed through. But there was nothing we could do. We could not bring in stone because the ground would not support a truck and there was no way we were going to try and wheel barrow 10 tons of stone over the 130 foot long path.
Our first greenhouse floor was made up from pieces of landscape fabric over the turf that was on the floor. The fabric was held in place by the bench supports and until things dried up we had to wear boots in the greenhouse.

When things warmed up the grass and weeds began to grow where ever it could, pushing the cloth up in spots. This would never do.
In July, when the season began to draw down, we set our sights on the greenhouse floor. The original plan was to bury pex tubing in the floor and pump water from a water heater through it but we felt pressured to get something down and didn’t follow through with that plan. We decided that we could bury the tubing at a later date if we wanted to.

We wanted to use crushed red granite because we like the look but it is not so good to walk on. The granite is like little marbles and does not compact the way crush limestone does. Since we were going to have a set bench layout we decided to use paving blocks on top of the granite to make a level walking surface.

The first step was to remove the sod. That stuff really smelled bad because we had burred it under the fabric but it had to go. If we had left the sod it would have rotted, which would have smelled bad. In addition to the smell the rotting sod would not make a good base for the stone. So we cut it out and wheel barrow it away. The floor is 14 by 32 and this was the hardest part of the whole project.
After we cut the sod out and levelled the floor we began to bring the stone in. We had a dump truck deliver the stone, now that the ground would support the weight. It was a big pile but we made short work of filling the floor in.

But before we did the stone we put down 2 layers fabric to block mud. The last thing we wanted is mud being forced into the stone. We brought the stone up about 3 inches above the original level of the ground inside the greenhouse. The total depth of stone is about 6 inches. This way the water can flow through with out rising to a level that would make working difficult. It also makes a floor that self drains once the yard dries up, which is the time we are using a watering hose.

This floor is nice to work on and can be warm when the sun is baking on it. When we put the next house up the greenhouse floor will be crusher run lime stone. The next house will be wider and we want to be able to change the layout if we want to and the crusher run will make a nice strong and dry place to work.

Crushed limestone is graded into different sizes at the plant using screens. The stone we want to use is one of the last to pass through the screen and is called crusher run. It’s a mix of stones, the largest of which are about 1 inches down to limestone dust. The benefit of this mix it its ability to pack tight into a surface that will not move around when someone walks on it. This is not the case with the granite stone pea gravel that is uniform size and is like walking on a pile of gravel. It really never packs down.

Propagating and growing lemon thyme

Lemon thyme (Thymus x citriodorus) is a variegated light green herb. It has a woody stem and one small plant will grow to fill a large container in one season. This photo shows the lemon thyme in contrast to common thyme.

lemon common thyme

It smells like lemon and can be use for cooking just like any common thyme. The flavors and aromas are best represented when the plant is picked fresh. It will keep but the oils do not retain the citrus fragrance. The good news is it will grow on a window sill and with a little care the plant can be carried over for a few seasons.

We know of no source for lemon thyme seeds so that means the plant must be propagated by cuttings and by taking up trailing pieces which have rooted next to the mother plant. We have not had much luck with cuttings but we have developed a method that gives us good viable plants in a few weeks.
We start with a plant that is healthy and has new fresh growth. Then we take 6 pack plastic inserts and we cut them into individual sections.

Next we select a fresh looking sprig or two and thread them through the hole in the bottom of the plastic container. Rooting hormone can be used to help things along but it is not mandatory.
Then we fill the containers with soil and keep them damp for about 2 weeks. We check the containers for evidence of root growth.

Once the shoots are rooting nicely we clip them off from the mother plant and then cut the plastic container free, being careful not to break the roots. The plants are potted up into 3 inch pots and fertilized.

Here’s what it looks like. Some of the containers get flipped sideways but if the Pro-Mix is damp it usually does not fall out.

lemon thyme starts

Lemon Thyme

We keep the starts a bit damp for about a week and then we allow them to go a bit dry between watering’s. They like full sun and will do well in very poor soil that is not too wet.
Another way to get plants is to grow it in a larger container and take the out-cropping that appear when a branch touches the ground and sends out roots.

We have taken small plants and potted them up in gallon containers with the tips of the branches sticking out. After a few weeks these branches will have put out roots and they can be separated into individual plants. Once they get going they branch out and fill a pot in no time.
We feed them with a low nitrogen fertilizer when rooting and a balanced fertilizer once they are potted up.
We have seen aphids on the lemon thyme but a few application of pyola oil takes care of them. Also they may be susceptible to scale and fungus so we treat them with serenade. Serenade is safe and can be applied to crops the same day they are picked.

We have plants that have be brought in for 3 or 4 years but they tend to get a bit straggly. It is a good idea to always keep a few good plants for future propagation.
Our original plant was a 3 dollar 3 in pot and that has served as the host for all the lemon thyme we have grown over the years. The original plant is over 2 feet in with and fills a very large terra cotta pot that we bring into the greenhouse for the winter.

In the summer the plant cascades down almost covering the pot. It is a nice plant to look at and make an interesting addition to herb gardens and baskets. The plant does flower but the variegated yellow and green leaves are so the main attraction.