Archives 2008

Starting plants for a zone 4 garden

A reader writes, “when is a good time to start my seeds for this area”.

This area is northern NY State off the eastern end of Lake Ontario and while zone can vary between 4 and 5 b we usually consider it a zone 4. To answer the question we first must decided when to plant. Generally we use Memorial day as a rule of thumb. Memorial day this year is the 26th of may or the last Monday in the month of May. It could warm up a little early but we can still get frost that late.

We have a military base, Fort Drum, near by and that means there are new families moving into the area on a regular basis and they come from all over the country. Those from the southern states are not familiar with our winter weather and late springs. To add to the problem are the big box stores who sell plants that are definitely not suited to our climate. Some of the workers try to be helpful but apparently the training is lax and the help cycles in and out so they are not dependable.

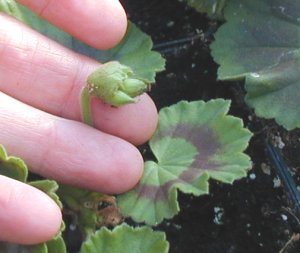
In years past we were at the mercy of the weather and advance forecasting was even less accurate than it is today. We keep a stock of old sheets and other materials that can be used as a cover in-case a late frost hits. As a matter of fact last year we were surprised by an un forecasted frost that hit our German Ivy and regal geraniums.

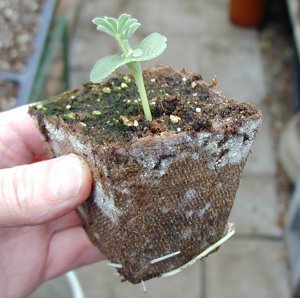
So if we consider the planting date to be the last week in May we can work backwards to determine the best time to start seeds. For most tomato and peppers we like to start about mid March. Other garden vegetables like squash and cucumbers are started a week or two later. Usually seeds packets will have the plant by information on the back. For example plant 6 to 8 weeks before date of last frost.

Many other seeds are started much earlier such as Viola and Pansies. These plants can be but out early as they are somewhat cold hearty. The impatiens and begonias take for ever to start and so they are started in February.
What ever the date the key to starting seeds early is sufficient light. A sunny window will work but the difference between starting seeds in a bright window and using a greenhouse are remarkable.

Years ago we used south facing windows that were fitted with shelves for starting plants and we thought they were acceptable. After we began growing in a greenhouse we were surprised at the difference. The plants are less leggy and stronger when grown in their greenhouse, especially if it is a bright sunny spring. If the weather is gloomy the plants suffer, even in the greenhouse.

Lights can help when good sunlight is not available. The choice of lights is a broad subject and could take many pages to address but for most practical purposes plain old fluorescent bulbs will work. More expensive broad spectrum light are available but plain old day light spectrum will work fine. The key is to keep the lights just above the tops of the plants. If the lights are not very near the plants they will be leggy and not very strong. A good way to make an adjustable light is to hang the fixtures from eye hooks using light weight chain. This way when the plants grow the lights can be moved up a few links.

In closing it is best to ask some of the local gardeners how soon they start seeds and how soon the garden can be planted. By using sage experience you will help avoid being disappointed. Try with the locally owned greenhouses or ask if there are gardeners in the neighbourhood who will share their experience. They will most likely be happy to share their knowledge with a new comer, the biggest problem may be getting them to stop.

starting seeds

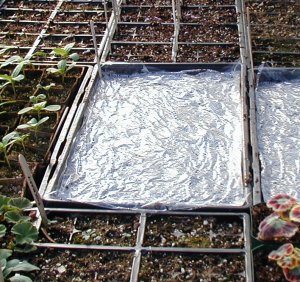
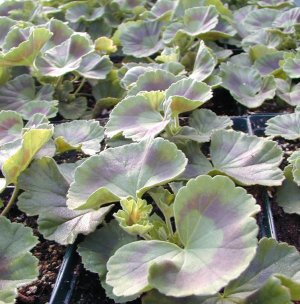
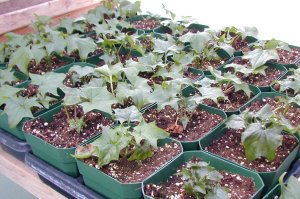
Starts on the bench. We sometimes use cling wrap to keep newly planted seeds moist and protect them from drying out. Just be sure that the flats do not become too warm in the sun.

More propagating & growing zonal geraniums

We propagate zonal geraniums the same way we do many other plants and that is by cuttings. The post on growing German ivy goes into the process in detail with photos.
The geraniums starts like it warm and sunny.

zonal geramium

Warm because if it is cool and damp they are liable to develop fungus or Botrytis blight and both are not good. When this has happened in the past we first let the plants dry out a bit and treated them serenade. Another fix we have tried is ground cinnamon but the serenade works fine and is certified organic.

The thing is with the geraniums, once they have good roots and are growing it will not hurt to let them dry out a bit between watering. And keep them warm. The fungi seem to like the cool and dam conditions.
Once they are growing good we like to keep them pinched back in the middle to encourage them to bulk up and branch out. Every day we go over the starts and look for evidence of flower buds, which we pinch off. We want them to grow nice leaves and strong roots.

If we see these we pinch them off and keep the center top leaves pinched back too so the plants will get stocky with good branching. It seems mean to pinch perfectly good leaves but the end result is stronger roots and better foliage.

zonal geranium starts

The fertilizer we start them on is a 5-10-5 to help the roots but after they are flourishing we switch to a liquid 24-8-16 which is good for the foliage. When we are ready to let them bloom we switch back to the 5-10-5.

Make sure the geraniums are in a warm sunny area and they will take off.
keep the geranium in a sunny place

The plants above have good color and abundant new leaf growth. They are strong and will soon be potted up from the 4 inch square to quarts.

Tools for starting seeds

In gardening, as in many other endeavors, we strive to make our tasks easier and more efficient through the use of tools for starting seeds is no exception.
For many gardeners no tools other than the ones attached to our wrists are necessary. Since we usually plant thousands of individual flowers and vegetables we use a few more.

The most important tool we use is the potting bench. Ours is about 3′ by 4 feet and it is about the height of our benches. We can site easily on a long milk crate while we do tedious work. There is room for a 6 gallon bucket of ProMix and the flats or pots we are working on. The sides are about 8 inches high and made from red cedar and the bottom is made from MDO board so the whole thing is impervious to water and does not need to be painted. This size works well for starting flats and transplanting seedlings.

If we are working with gallons we wet the ProMix in a large wheelbarrow and use the same milk-crate stool.
Another tool we use for starting seedlings is a 8″ wide plastic taping knife.

This tool is great for leveling off the soil in the starting flats. When held straight up and down it will make perfect little rows for the seeds. After we put the seeds in the rows we cover them with a small amount of dry ProMix and wet it with a small watering can that has a soft sprinkle head.

If we are concerned with keeping the seeds moist we cover them with a piece of plastic wrap. It is just wide enough to cover a flat but we watch to see that the sun does not make the soil too warm, which could ruin the seeds. On a sunny day we uncover the seeds making sure they stay moist, and we cover them at night. Since we have warm air circulating under the propagation bench the seeds get a good start.

When we are finished it cleans up the inside of the potting bench. It is important to keep things clean to inhibit contamination from diseased plants or pests and the plastic knife is easy to clean. Plus is does not rust.

We use wooden craft sticks to mark the rows and write the name of the plants using a black sharp marker. The marking will last through the winter, covered with snow. The plastic markers are very expensive and not very ecologically sound. We are forever tilling them up when we do the rows because the do not break down. I don’t suppose they do any harm to the environment other than the indirect problems associated with plastics production. The real reason we use them is the low cost.

We use the commercially available 12″ by 18″ starting trays with drainage holes in the bottom and these fit inside a daisy tray for added support. Once the seeds are starting and have a second set of leaves we transplant them. We used to start all the seeds in the trays but found that it was a waste of time because most of the seedlings will do fine when started right in the 6 packs or where ever they will be sold from.

The exception are the tomatoes. We like to start them in the flats so we can transplant them very deep, up to the leaves, after they have started. Using the trays does save space in the beginning but the place fills up anyway in short order. Thankfully a lot of the plants can take cool weather and so they go out into the secondary greenhouse fairly early.

Maple Syrup Season

Now that the sun is getting higher and the temperatures are around 40 the maple sap is running and its Maple Syrup season in the North Country!
My first memories of what I though was maple syrup are the bottled pancake syrup that are made from corn syrup then colored and flavored to taste like maple syrup. As a kid we ate what were were given and so that was that.

One spring our parents tapped the 3 maple trees that lined the driveway. I don’t remember much because I was probably about 5 or 6 but what I do remember was the constant steam loosened some of the wall paper and that was the end of that.

The only other thing I remember was we made something called sugar on snow or wax on snow or something like that. My mother heated up some of the syrup and cooked it for a while. Then she poured the reduced maple syrup over snow that we packed into cake pans. The syrup hardened into a sort of taffy and we could pick it up and eat it. Thinking back she must have cooked it to at least a soft ball stage if not further.

A few years later I was introduced to a real sugar bush. My pal next door knew about a man near by who tapped trees and boiled the sap into surip. We headed off on our bikes and ended up in a grove of maple trees that was still carpeted in a foot of snow.

The shanty was a unpainted wooden building with a large vent in the roof to let the steam out. One side of the building was connected to a large tank full of sap and the other side was piled high with split wood for the fire.
All the trees around us had tin pails with folded tops hanging on them. He had a sled with a big wooden tub and a horse to pull it through the woods as he emptied the buckets into the tub. When the tub was full or all the buckets were empty the horse pulled it back to the sugar shack and it was allowed to drain by gravity into a holding tank.

Inside the shack the metal evaporators were large, to us, probably 2 or 3 by 4 or 6 feet wide. There was a fire box underneath and he would periodically open the door and stir the fire or chuck in a piece of wood. A scum accumulated on the surface and there was a piece of salt pork suspended above the surface from the ceiling with a piece of wire and a small iron hook , to keep the bubbles down I suppose.

The owners name was Vince LaFave and when we entered the shack he was skimming the syrup and offered us a taste. He reached up and pulled a tin cup down off a nail and dipped out some of the syrup for us to taste. I remember it was smoky and sweet and how he warned us about drinking too much because it would give us the runs. We spent an hour or so poking around and asking questions and petting the horse and headed home.

I remember going back a few times. After a few years he built a new sugar shack close to the road. It was a more modern metal sided affair with a trolley for moving wood from the covered wood storage area to the enclosed evaporator room. I don’t ever remember if he used the new sugar shack, which is still there, but loggers went in and cleared out most of the maples a number of years ago.

Fast forward 20 or more years and we were living in a house 3 doors down from home. This house also had maple trees and we thought it would be fun for us and the kids to tap them and make some maple syrup.

We went out and bought enough taps for 3 trees, 3 taps per tree. One of the trees was probably 100 years old and the others were more like 40 or less. We used a wood bit and drilled the holes about 3 inches deep on a bit of an upward angle. We used a hammer to seat the taps in the holes and hung some plastic buckets under them.

The buckets came from the grocery store bakery and they had tops. We wanted to use theme with the tops so rain and debris would not fall into the pails so we cut a 3 inch hole in the side just below the rim and used the edge to hang them on. They only held about a gallon or so and we transferred the sap into 30 gallon plastic barrels that we kept out side and in the shade.

When the sun was shinning and the temperatures were in the 40s the sap just about ran into the pails and we would need to empty them several times a day. The sap would stop running hard at night so as long as we got out early we would not loose any.

To boil or evaporate the sap we used a 12 by 18 inch stainless steel kitchen pan that was about 3 inches deep. It would fit over 2 burners of the stove and the wide areas allowed for greater evaporation. We used cheese cloth to strain the sap into a clean pail before we put it in the evaporator.
We boiled and added more sap as the level went down. After boiling all day we transferred the syrup into a large pot for finishing. This way we could take it to the proper temperature which is 7.1 degrees above the temperature of boiling water. We did not have fancy digital thermometers at that time so we eye-balled it but we did check the thermometer with boiling water first, each day. Evidently the temperature at which water boils changes with the barometric pressure, which changes every day. Incidentally this is probably why it can be difficult to make fudge constantly from day to day using the same temperature point. I’m not sure what the temperature differential is for fudge but I think it is well worth looking into. We eat so little fudge that it would be nice to have it come out perfect every time. But I digress.

While we were finishing the syrup we sterilized mason jars. We used quarts, pints and half pints. When the syrup was finished we would pour it into the clean hot jars and cap it. This was the tricky part because the syrup was very hot and it could be easy to be scalded.
We did the syrup thing for about 3 years and every year we were rewarded for our efforts with 5 or 6 gallons of really nice medium dark amber syrup. It was odd but we found that the old tree made dark maple syrup and the 2 younger ones made light amber. We simply mixed them up to make a nice full bodied flavor.

I cant remember if the cost of the gas for the stove offset the cost of the maple syrup but the experience and fun made it all worthwhile.
Here is a site that goes into the process of making maple syrup in great detail.

Propagating and growing pineapple sage

Pineapple sage (Salvia elegans) is really a member of the mint family. When the leaves are touched the plant gives off a very strong pineapple fragrance. It get about 3 feet high and has bunches of delicate red flowers. This is a zone 8 or better so those of us in zone 4 will need to treat this one as a annual.

In order to assure a good supply or to share your plant you will need to learn the tricks of propagating and growing pineapple sage.

This is interesting because we have another annual herb called pineapple mint. It is variegated green and cream colored leaves and grows like a crazy plant spilling over the sides of containers and not acting like a mint at all.

It really is an interesting plant. We kept some over from last year and had planned to take cuttings from one very large specimen that was covered with new growth. Unfortunate the greenhouse door was left open and the plant was killed. However we did have 2 other smaller plants with some new shoots and since we had nothing to loose we took some small cuttings.

The shoots were no more than 2 inches long but each one had at least 1 extra set of leaf nodes, so we pulled the lower leaves off leaving only 4 small leaves per cutting.
Then we dipped the stems in rooting hormone and pressed the stems into small containers of pro-mix and kept them damp.

At first they all wilted but after about a week half of them seemed to be picking up. Sure enough when we lifted them from the soil they had roots so they were transplanted in 4 inch pots. Like the other herbs we intend to put the pineapple sage into quart containers so they can get big.

We were worried that there would not be enough plants for sale but it looks like we will have more than we had expected. Since the door incident we have kept some of the plants that seemed to be killed just in-case there was life left in the roots.

Now that we find this is a mint it is no surprise that there are a good number of shoots coming up from the pot. In addition to that we put a one of the smaller but vigorous plants in a larger container and spread the stems so that every stem was under the soil but the end leaves were above the soil line. This is a method we use for some other plants that can not be grown by seed. The soil is kept damp.

Sure enough today when I gently lifted the soil from around the plant stalks there were very good roots going down into the soil. After a few days they will be clipped from the mother plant and moved to 4 inch pots until they are ready for the quarts.

It looks like we will have plenty of the pineapple sage this year after all.

Propagating and growing white geraniums

This year we had a problem in that some careless person left the greenhouse door ajar on a 15 below zero night. How anyone could be that stupid is beyond me. I thought I closed it tightly but I guess I was wrong.

The door is made of aluminium and when it is 15 below zero outside and 75 inside condensation forms on the door and turns to ice. The ice prevents the door from closing properly. We have tried insulating the door but it does not work so the only thing we can do for now is chip the ice away. Hopefully we will not have too much more really cold weather but you never know. This summer we intend to replace the door with something more substantial.

Anyway today we continued propagating and growing white geraniums. It is a miracle that we had any to work with because the plants we wanted to cut from were in the direct path of the sub zero temperatures that got into the greenhouse that fateful night.

There were only enough from other plants that were not affected to make 15 pots. The rest we started from small growing plant ends, most about 1 inch long.
We started by taking cuttings that were new growth and that had more than 3 nodes. The bottom node is split to expose as much of the natural growth hormone as possible. For extra insurance we use rooting hormone.

The starts were placed in wet ProMix 608 flats. That is 6 packs that make up 48 cells to the flat. and we kept them wet. It has been a little more than 2 weeks and many of them have nice roots. A craft stick can be used to gently lift the plant from the cell to look for roots. They will be obvious and the small ball of soil will be held together.

For the ones with the roots, we transplant them into square 4 inch plastic pots using ProMix. It is amazing how big they look after being transplanted. The flats are put in a shady spot and kept slightly wet, not saturated. We want the plants to be able to take up water but we do not want to rot the roots.
The starts did really well and part of the reason is we are directing heat below the benches. This keeps the soil in the pots and flats warm and the plants seem to like warm feet when they are making new roots.

Once the plants are firmly rooted in the 4 inch pots we water them as a growing geranium, that is we allow them to slightly dry out between watering. I guess it is because the geraniums are similar to a succulent that they benefit from being allowed to dry out. As a matter of fact we have kept mature geraniums in the cellar all winter with a very small amount of water, maybe once a month.

In the spring the plants are trimmed back and given water and some times re-potted. After months of little water the soil becomes dried out and will not hold water or nutrients very well. They seem to bounce back and its a good way to keep from having to buy the same plants year after year. Instead new specimens can be added to the collection.

At this writing we have white, red zonal, zonal peach, variegated green, Mrs Henry Cox, distinction, variegated yellow and green, crispin, small citrus, apricot, mint, citronella, chocolate mint, lemon, pink ivy, black ivy, red ivy, purple ivy, many seed varieties, about 8 different Martha Washington’s and probably a few more I missed. There are most likely more than 30 kinds of geraniums growing now in the greenhouse but we are always looking for more.

We are definitely going to have more greenhouse space very soon.

Propagating and Growing German Ivy

We have been using the same German ivy for many years. We have not had to buy a plant in more than 5 years. It’s fast growing and will fill a basket and trail down more than 2 feet given enough time. I’m told this is not really an ivy but a vine. That makes sense as the stems are more succulent than woody.
It keeps well in the house or greenhouse and it puts out pungent yellow flower masses, if we let it. Actually the fragrance is not what you would call pleasant. As a matter of fact it stinks worse than dirty socks.

The first time we had a bloom in the greenhouse we thought something had got in a died.
Today we took 3 baskets we kept from last year and trimmed all the terminal ends off. Then we dipped the ends in just a bit of rooting hormone and stuck them into 4 inch pots filled with pro-mix. We will keep the pots damp and in the shade for a few weeks and until the plants have taken root and started to grow.

This stuff is really easy to root and a look at one of the trailing stems will tell why. At every joint the plant sends out new shoots and in many cases they send out roots as well. The rooting hormone is probably over kill but we only use a very small amount and it is cheap insurance.
The plants also root if the stems are allowed to contact soil for a week or 2 and a cutting put in water will grow roots in very little time.

Once the German ivy is well rooted and sending off new shoots we will transplant some of them into 10 or 12 inch baskets. We normally use 3 plants per basket if they are to be planted alone. This ivy works very well with ivy geraniums but we need to be careful to make sure the geraniums are larger and well established. Otherwise the German ivy will take over and bury the geraniums.

The German ivy works well with moderate light and will thrive in lower light conditions. We let the plants dry out a bit between watering.
The biggest pest problems seem to be aphids and mealy bugs but this problem is not so pronounced when the plants are growing out doors.

Last year we put 4 really nice flats out to get some fresh air and they were hit by an un-forecast frost. The plants came back but they were not so well formed as before. This is just one of the challenges when growing in our cold weather zone 4 climate.

UPDATE:
It has been 10 days and the ivy has 1/4 inch roots. Even the trimmed leaves are starting to root and all the plants have new growth. Now the challenge is to keep the beasties away. We only use organic pest control and the greenhouse is growing all year long so we can not let up. Pyola oil about every 7 to 10 days does the trick.


STEP BY STEP instructions on propagating German Ivy with photos.


Ivy 1

Step One. Choose a 2 to 3 inch section from a healthy plant and snip it off with clean shears or using a knife or razor blade.
choose a section from a healthy plant
Ivy 2

Step 2. Pull the leaves off the bottom 1 to 2 inches.
Pull the bottom leaves off

Ivy 3

Step three. Dip the lower 1/2 inch or so into rooting hormone.
Dip the lower portion into root hormone
Ivy 4

Step four.Fill a pot with Pro Mix and poke a 2 inch hole in the center.
poke a hole in the soil

Ivy 6

Step five. Check the roots. These roots are about 10 days old.
German ivy roots at 10 days
ivy 5

Step six. Put the stem in the hole and firmly tamp the soil.
tamp the soil down

Ivy 7
Water the pot and place in a warm, 70 degree F., and shady area until the plant send out roots. A low nitrogen liquid fertilizer will help roots to grow. We use Age Old Organics 5-10-5 for starting cuttings. Keep the soil moist, not drenched. German ivy can take some sun but likes shade too.
place in shade until roots grow

Starting the Lupins

Today we took the first step in starting the lupins from seed.

Lupins are perennial plants in zone 4. The plants are made up of tall 3 foot or better spikes that are covered with small flowers.
They are a versatile plant and actually help to improve the soil by fixing nitrogen from the air. Some folks are even working on the idea that lupins are high in protein and would make a good animal feed.
We are growing Russel Hybrid, some yellows and some other blue violet varieties.

Lupins have a really tough seed coat and it seems to help speed germination if the seeds are soaked overnight in water. Some people score the outer coat before soaking but we have never tried because the soaking seems to be enough. A emery board works, just scratch the surface and watch that you don’t sand your fingers down.

The lupin plants begin with star shaped leaves that hold a drop of water like a jewel.
For more about lupins check out the lupin.org page.
Today was also a day for starting coreopsis is also know as tick seed and they come in a variety of colors and sizes. Most common are the yellow sunburst and sun-ray.
We started some dwarf red, sun-ray, sunburst and bi color which as the name implies, is a 2 color bloom with yellow flowers and a red center.

lupine pot

They are a very popular perennial for zone 4 and colder climates. We handle them just like many other perennials where we keep them over for a winter if we have enough.
For more information on coreopsis check out the USDA page.

Everything else is coming along with the abundant sunshine we have been getting. Our biggest challenge will be space. We really need more bench space and that will be the plan for this summer.
This is a yellow lupine growing in a peat pot filled with promix. The roots are starting to exit the bottom of the pot. We will pot these up to 4 inch or quarts for a while and what does not sell will be put into gallons for next year.

After wintering over they come back bigger and with more flowers. The largest challenge is keeping the voles out of the beds. Voles dig into the pots and eat the roots which kills the plants.
Yellow lupine

We are eager to see how the yellows do. So far we have about 75 percent germination but they can be a bit slow so we will not toss the pots that have no apparent growth so far.

Spring is just around the corner

It is about time we got back to the blog.

For one reason or another there have been no posts and I am sick of it, not to mention that spring is just around the corner.

The greenhouse is starting to come alive with seedlings and new plants. This year we decided to work with some fuchsias and we have been rewarded with a bumper crop. They should be ready for spring baskets.

We did have a set back a few weeks ago when the greenhouse door was left ajar on a 15 below zero night. The problem is ice that forms on the inside of the aluminium door when the temperature inside is warm while the temperature outside is below zero. The door appeared to be closed tight but the ice forced it open.

We lost a number of plants but thank goodness there were many more that were spared. The new geraniums were on the bench very near where the heater blows and they were spared.

Unlike the problem last spring when we failed to anticipate a cold night and our crop of regal geraniums was badly damaged.
It is very important that we remember that zone 4 temperatures can dip to 30 below and more. Spring can start early and seem warm but we have had snow on mothers day.

I think we will be doing some work on the greenhouse this season including a better insulated door and new siding for the front and rear.

Bread and Butter Pickles

Phyllis really likes bread and butter pickles and although I prefer garlic dills I have to admit a good bread and butter pickle goes with almost any sandwich. Well maybe not peanut butter.
I remember back when I was first exposed to this type of pickle, in my mothers canning cupboard. I was a little confused by the presents of many things that I did not consider to be pickle. Of course the cucumber was identifiable but why were there onions in there and what are those little round things and other strange looking ( to me ) things that settled to the bottom of the jar?
Since in those days, I did not pay much attention to my mothers canning, there was no way for me to know about the various spices and vegetables that were combined to give the bread and butter pickle its sweet and spicy flavor.

Fast forward to 2004 and we were getting ready to plant our first official garden at our new place. As the seeds began to arrive in March we noticed a pack of cucumbers that we did not order. I believe it was from Park Seeds. It was called the Eureka Cucumber and we were not sure we wanted to plant them. They looked a bit squat and stubby and not like a pealing cucumber at all. But waste not want not, we started some and set them out to grow on the stick fence that surrounds the asparagus garden. We put a few more of them in the row gardens with no staking.
The weather that year was a bit wet to begin with but they did well. We were really surprised at how fast they went from fingerling to full blown cukes. That is if you can call a 6″ by 2″ or 3″ cuke full blown. We sliced up a few and they were OK for eating but the trouble was they were coming in by the peck each day. We put some on the stand and they sold but we had many more than we could possibly deal with.

Since they were billed as a dual use cuke, for pickles and slicing, we decided to put some up. The fruits were rather fleshy with medium sized seeds and they would become fat and yellow in a day if we did not pick them in time. So we continued to picked them and kept them cool.
We decided to make both bread and butter and dill pickles but in the end we made 2 versions of the bread and butter and one of the dills. As it turned out they worked perfect for the former and not so hot for the latter. The problem with the dills is they were soft and opaque, and not to my liking. The kids on the other hand made short work of the dills.
We found the recipes at at the Minnesota cooperative extension web site. We use them a lot since their climate is similar to ours.

Our favorites were the spicy bread and butter pickle. We omitted the liming process and they were fine. The trick is to get them just as they are ripe, because if you wait a day more they become soft and not so good.

We have run out of pickles and we went to the store to see what was available. We were very disappointed when we found every version of bread and butter pickle had high fructose corn syrup as a sweetener. Except for one and that one had Splenda. This is a perfect example of why it is far better to put up your own. I am ordering the seeds this week.